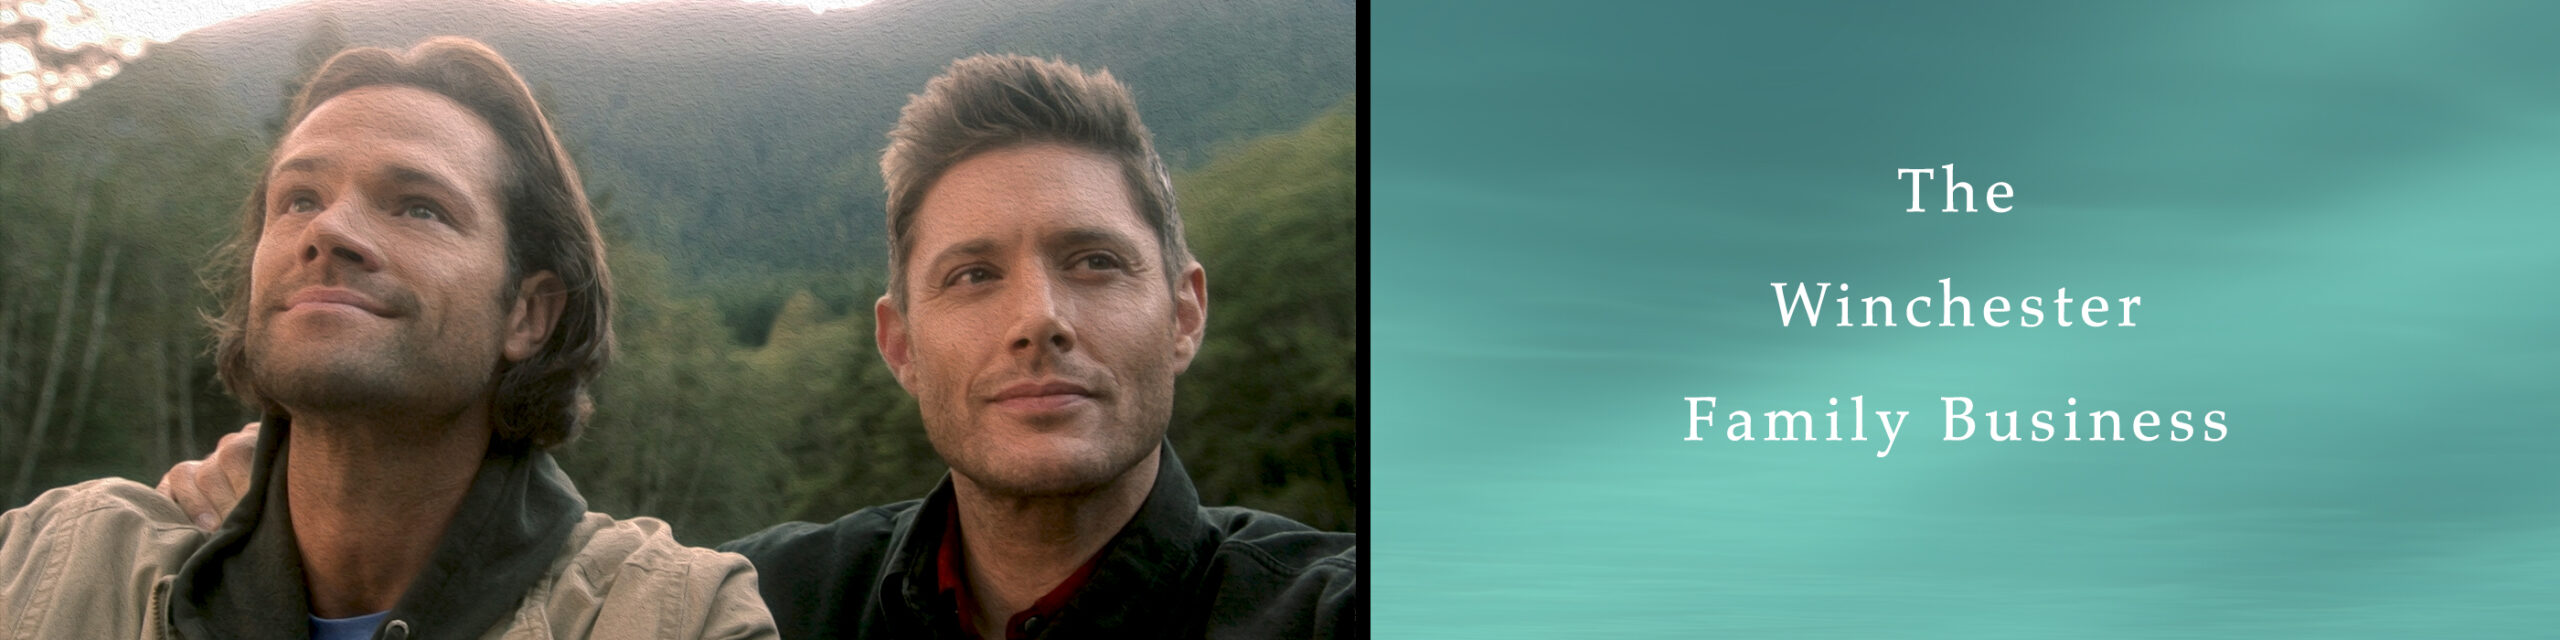
#AlwaysKeepFighting Captured In Embroidery: The How-To

Now that Fall is upon us, the inevitable question “what did you do this Summer Hellatus?” comes up. I can say with absolute certainty that I know what I did this past summer. I embroidered. A lot.
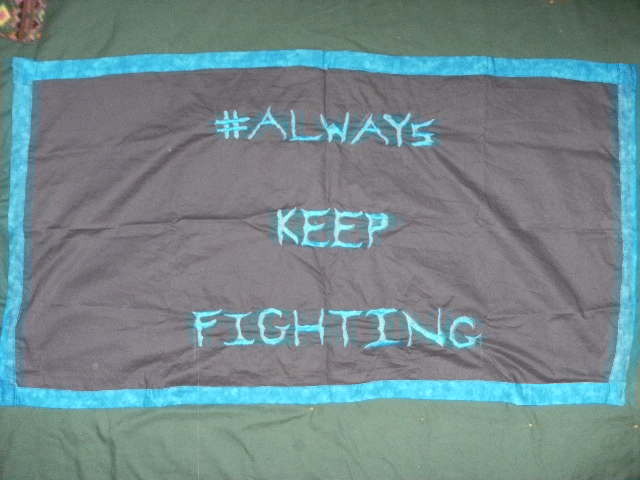
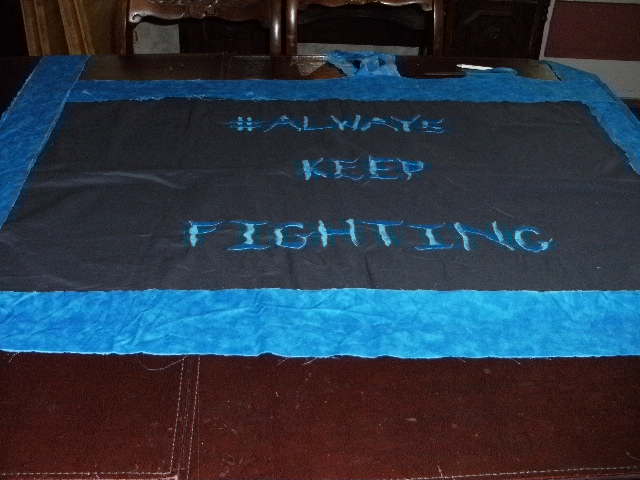
After Jared Padalecki announced the #AlwaysKeepFighting campaign in April, I think we all wanted to find a way to capture this campaign in our own unique ways. It triggered so many emotions, gave us something to champion, and allowed so many to come forward that wouldn’t before. This is a cause that comes with so much stigma, faces so many misunderstandings, and so often gets pushed to the back burner. This campaign has made us talk openly about depression, suicide prevention, and how we can not only accept those who suffer from these things but stand with them. For me, I almost immediately decided to capture the phrase in embroidery. Not only would I embroider one banner that I could then take to the convention and take a photo op with Jared, I made three.
Three seems like an awful lot to make—especially considering I only had from April through early August to make all of them. So why three? Simple: because I dream way too big sometimes and like to scramble apparently. That’s really how it seemed this summer as I worked fast and feverishly on all three of these banners at various stages of progress. In retrospect, I think I would have settled for making only two prior to #MinnCon but hindsight is always 20/20. Even so, I don’t have any regrets really in spending so much of my summer on these.
As each banner came together, I felt they finally captured what I felt about this campaign in embroidery. It made the phrase #AlwaysKeepFighting mean all that much more to me. In the end, it made the phrase elegant and stunning in the color choices I used. The original thread color had been a misfire, but when I stumbled across a small skein of a rich blue I knew I was onto something. Even though this thread wasn’t metallic, it glowed when I looked at it in my pattern. Somehow, that vibrant color suits the spirit of this campaign and I hope provides inspiration to anyone who gets to see it.
I made the first one to figure out the design, the second one so I could give it to Jared while going to #MinnCon and/or #VanCon (hint, I ended up mailing it to the set while in Vancouver), and a third one that will be auctioned for charity to honor Jared’s efforts to raise awareness on depression and suicide prevention. The charities of choice will be To Write Love On Her Arms and Attitudes In Reverse.
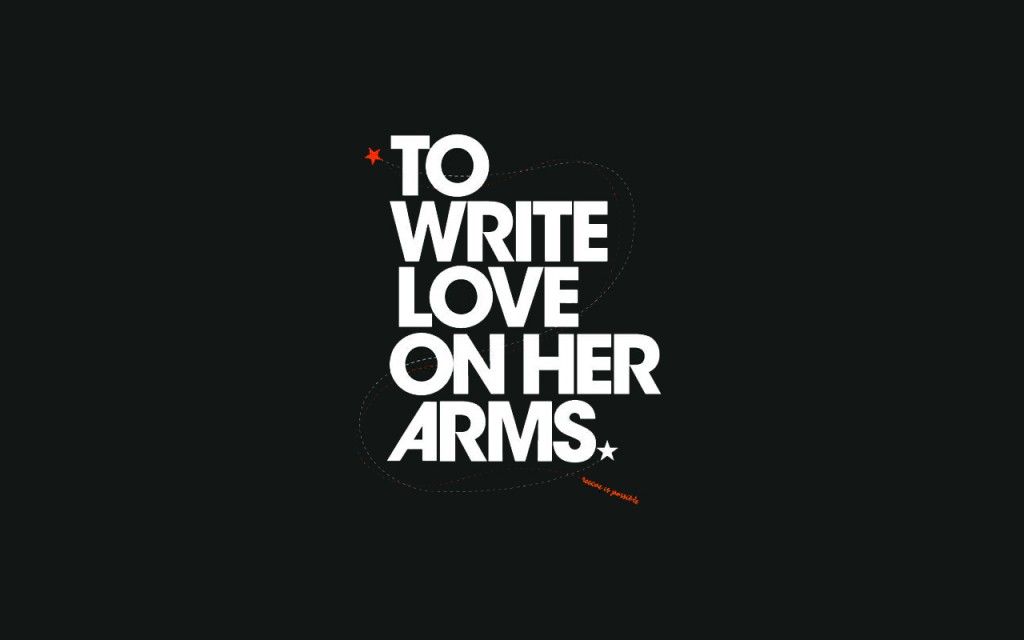
Why did I choose these two charities, you ask? The first one, To Write Love On Her Arms, happens to be the one Jared Padalecki mentioned specifically during the campaign—as all of us well know. I love that they’re working so hard to bring these issues out of the shadows and providing a safe space for everyone—whether you suffer from depression or know someone who does or want to understand it more—to talk about these things without judgment. The second is Attitudes In Reverse and I chose this one because of their diligent work to spread awareness not just of these subjects, but to break the ice within the school setting. I was privileged enough to meet them at #MinnCon, and having the chance to talk about their message made all the work I put in the banners all the more worth it. I hope the amount raised by the charity banner will help both of these worthy charities further the cause.
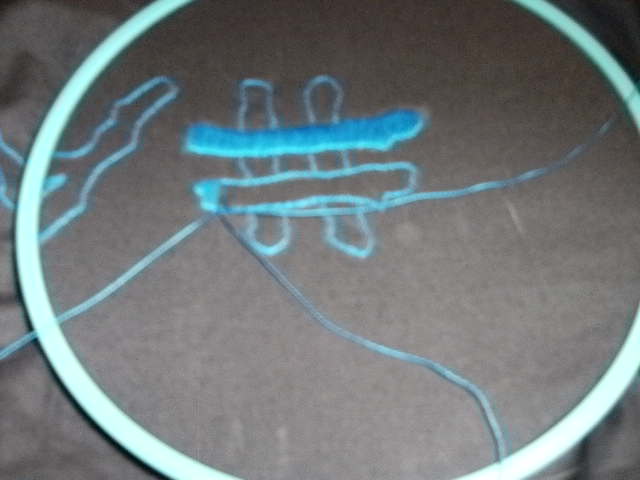
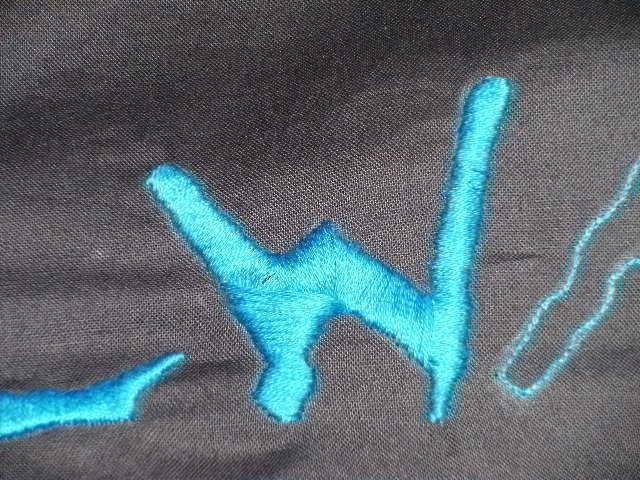
So, how did it spiral into a frenetic and frantic effort to finish on time? Easy. The first one went rather quickly, so I was hopeful that it wouldn’t be too difficult. I should have known that Murphy’s Law would step in and mess up that genius plan. The banner I kept isn’t nearly as neatly stitched, so that’s partly why it went faster. When it came to make Jared’s and the charity one, however, I ended up slowing way down getting each and every stitch put into both as perfect as possible. That really bogged me down when I got to the satin stitch phase as I ended up splitting my thread into its three strands each and every stitch. See the photo below to understand that meaning. Suddenly, I was worried I wouldn’t make it and spent every moment of free time working on these banners for the remainder of the summer—literally right up until the last weekend before #MinnCon.
Now that you know how I spent my summer, how did I make these banners? After all, that’s what you’re really hear to read about!
Let’s start with the supply list, shall we?
embroidery hoop or stand
needle
colored pencil
pencil
box cutter
scissors
ruler
embroidery scissors
Dark Electric Blue embroidery floss (DMC 995) approx 10 skeins
2 24X36 charcoal grey fabric
2 yards of marble blue edging fabric cut into four inch strips
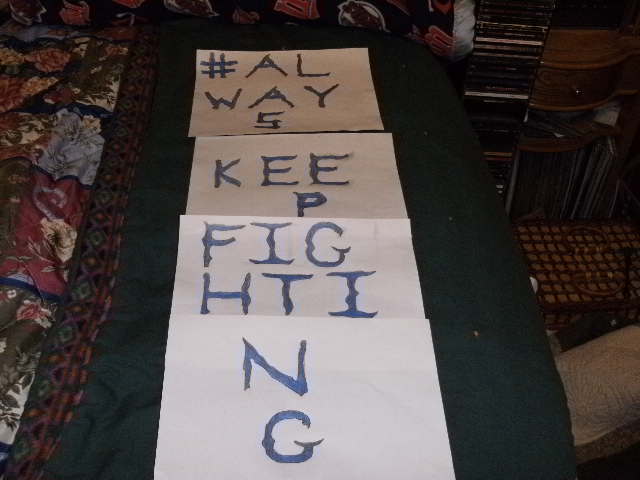
After I saw the first shirt, I knew this would make a great design, especially reusing the letters that I used to create the S.W. And D. W. center square for the Supernatural quilt. I used the S and W and then used their styling as a base to design the rest of the letters. Not to be lazy and use one pattern for the many repeating letters (the As and Gs for instance), I designed each one individually to make this pattern as unique as possible.
I photocopied the design and cut each letter out with my box cutter. Once each was cut out, I then laid them out onto the banner and determined where they should sit, the spacing that I wanted between the edges and the words, and then I marked the measurements with my colored pencil.
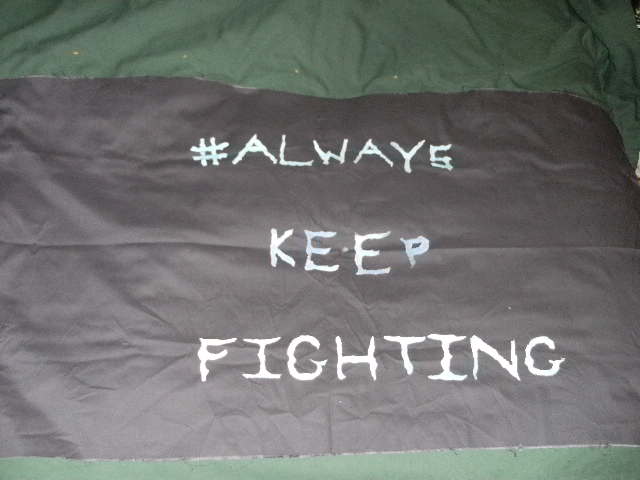
I traced the first letter of the pattern on—the hashtag—and off I went. Like my other designs, this is a two stitch process. The first stitch is the standard backstitch to make the letters appear on the fabric and set the foundation for the raised effect during satin. To execute the backstitch stitch, watch this video:
I only traced one letter at a time. When it came time to do this step on the one for Jared and the charity one, I did this slowly, making sure each letter was well defined and matched as closely as possible to the design I had made on paper. To make sure it’s cleanly done, I kept all of my stitches as tiny as possible.
After all the letters were done, I satin stitched to fill them all in. To learn how to do the satin stitch, watch this video:
This design is a bit trickier to complete, however. Each letter is unique to cover up and will take some approaches to cover the odd angles and corners. I learned to save the W for last to keep that letter as smooth as possible. To complete the Y, I did the first two upper arms down to where the bottom of the Y would meet, putting some of the stitches not over the backstitch itself, but into the center of the letter. Then, I did the bottom portion, covering that so it would look like a solid letter. As I went slower, splitting it into three strands and pulling on each one carefully, it really left a smooth appearance on all the letters, giving the banner a richer and more elegant look.
Once all the satin work is left, the next step is to back it with the other 24X36 charcoal grey fabric. Carefully meet the two together and pin. I used more embroidery floss rather than sewing thread to stitch the fabrics together. To keep those stitches from showing potentially when the edging is added, use a thread close in color to the fabric.
Next, cut up the edge fabric into four inch strips that will be folded into approximately two inches. My trick for edging is to pre-pin the edging fabric with all the raw edges folded and pinned down prior to pinning it to the actual banner. Those raw edges were folded in approximately half an inch while I pinned them. I typically left them overnight so they would hold the fold after I took the pins out and pinned it to the banner for the final stitch. I used the same thread as the letters to sew the edges on.
After each edge is stitched on, you’ll have a completed banner!
So, what happened after I was completed with this process, you ask? I went to #MinnCon and managed to present my banner to Jared Padalecki himself. Lady Mickey D and I took a photo op together, and I went up and presented the banner to Jared, telling him, “Thank you for inspiring me to hand-embroider this banner.” The moment that I said “hand-embroider,” a shocked expression crossed Jared’s face. I allowed him to take it from me before the picture was taken, and he held it up high to look at it closer.
All the hard work and long hours working all this summer paid off in that single moment. Not only did my embroidery successfully capture the slogan Jared had given the fandom with his first t-shirt campaign, I had a moment to give back to him. It allowed him to know just how inspirational he’s been with his honesty, his vulnerability, and his compassion to bring these subjects into the light.
If you’re interested in the charity banner, the auction will be held soon. The charities will be To Write Love On Her Arms and Attitudes in Reverse. Each organization is doing fantastic work to bring awareness and acceptance to these crucial issues in our day.
How have you captured the spirit of the #AlwaysKeepFighting campaign?

Farawayeyes! Long time no see! Your design looks good. I love the colours and font. Much better than my beginner efforts at stitching.
Thanks. I’m glad you liked what I made so much. It was a lot of work, but I think it turned out really well.
What did you stitch??
I just tried to stitch over a pre drawn pattern of a butterfly. I hadn’t a clue how to stitch so it ended horribly xD
Aww. I remember it being like that for me when I was nine-ish. I learned how to embroider at that age. I think it was my lack of patience at the time that made it so hard.
[quote]How have you captured the spirit of the #AKF campaign ? [/quote]
By trying to be there for friends and family that may be struggling. By trying to be patient with those that might be having a bad day, because you never know what that person is going through. Just trying to be a better person. And wearing my AKF t-shirt as much as I can.
I remember embroidering my project to my pants on many occasions.:)
That’s awesome. I think that’s another thing I’ve taken from this campaign, too. Even though I think most of us would like to think we were already doing that kind of thing—and some of us probably were—I hope it made all of us think about being even more understanding or patient than we were before.
And I can’t say I’ve ever done that with any of my stitching. But I can see how it could happen.
Nicely done! You’ve motivated me to get my craft on (since MinnCon).
Thanks for the tutorial.
I’m glad I could inspire you to do some work on your own stuff. I hope you’ll share some of it.
Glad you liked the tutorial on this one.