The Making of the Devil’s Trap: A How-To
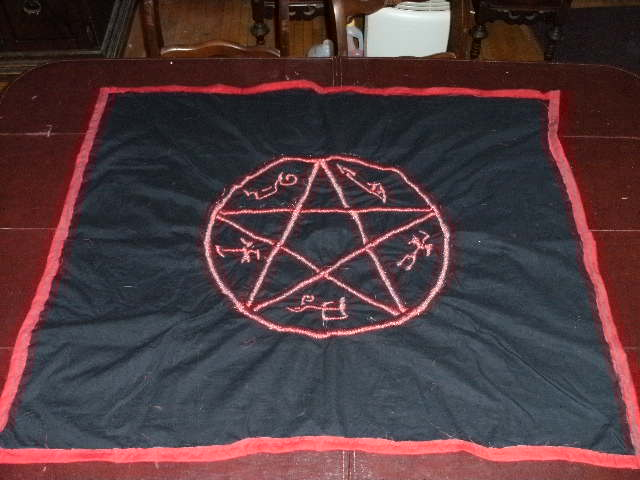
At the Salute to Supernatural Vancouver convention, I debuted my handmade Devil’s Trap. You heard all about me showing it to the cast, crew, and fans in this article, but this one is all about how it was made. I’ll walk you through the process from start to finish, complete with photos showing you how to get the standard Devil’s Trap seen on the show from printed computer image to stitched final product.
I’ve compiled a list of supplies that I used. They are:
round platter with a diameter of 18”
Another platter with a diameter of 18.5”
star decals to map out the star
pencil
ruler
black sharpie
large enough piece of cardboard
box cutter
scotch tape/masking tape
colored or fabric pencil to transfer to fabric
metallic thread DMC E815 Dark Ruby Red
embroidery scissors or small scissors
embroidery hoop
embroidery needles
fabric (QTY 2 solid black, 1 yard red cut into 2” strips)
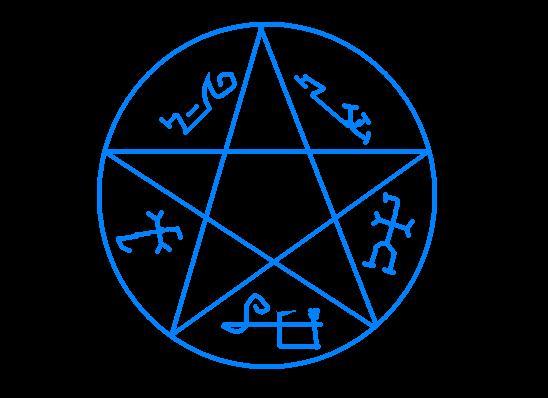
I used this image of the Devil’s Trap found at the SuperWiki. It made it easy to make a clean and transferable design.
For the fabric, I’m working with a piece the size of 34X43” in black and the thread choice is a metallic red that comes in 6 ply I then divide into 2 strands. (Warning about metallic thread: working with this takes more patience than normal thread. It will want to shred and fall apart if you do not work slowly and carefully.)
The stitches I’m using to make this design will be pretty standard. Simple is best here! They are the back stitch to outline and satin stitch to fill in the lines and make them well defined. Each stitch will be done by hand. No machine work here! I will show you how to complete these stitches when we get to that point.
Now that we know what the design is and what the materials are, let’s get started with the transferring process shall we??
I started with the inner circle, using the 18” platter I had available. Once that was in place, I traced it over with my black sharpie so it would be well defined. To make the outer circle, I recommend you get another circle that is a ½ inch bigger. It’ll make the next step—the outer circle—that much easier. I, however, lucked out. I had to improvise, and if you find that you also have to do that here’s how I managed it. It’s a bit tedious, so you’ve been warned!
What I did was put a ruler down and measure out ½” and then line up the 18” platter to that spot to trace a small bit of the curve. I then would check over each time to make sure that I was still at the 1/2” mark and then make the next guide post to match it until I had a completed circle surrounding my inner circle. It probably isn’t exactly a perfect circle, but it is damn close and gives me the 1/2” satin stitching surface I’m looking for to make the design solid on the fabric. Be patient with this part if you have to take this path and just take your time. Once I had it to my satisfaction I then traced that over in black sharpie so it would be defined.
Next I constructed the star in the center. I bought a smaller star and centered it in the middle of the circle. I traced all around it and then went back to connect all the lines so it would make a pentagram styled star. Next, I measured out 1/2” all the way around and made another pentagram style star around it. I repeated this process until it reached the edge and formed a large enough pentagram star that filled the circle properly. I erased the center stars until I had the star 1/2” thick for my satin stitch work later. Then I went back over the star I wanted with my sharpie so it would be dark.
I took the symbols and blew them up on the computer in the Paint program so that I wouldn’t have to try and draw them by hand in a larger form. I then printed them off and cut them out of the paper to put down in their prescribed spots so I could trace them into place. Once each one was done I went over it with the sharpie. Voila! I now had a Devil’s Trap ready to cut out of cardboard to then transfer to the fabric.
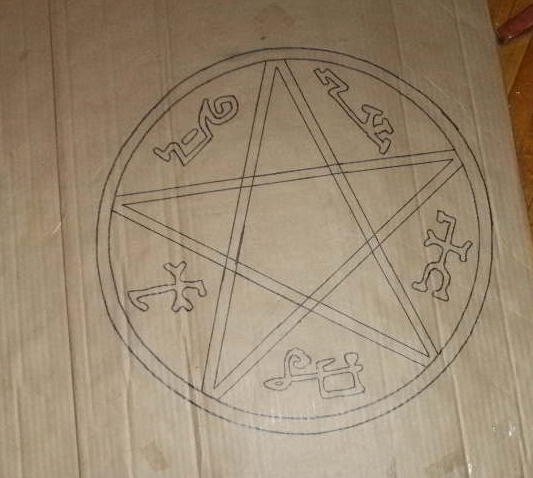
To cut the pattern out of the cardboard, I used a box cutter with as precise of cuts as I could manage. I cut the triangles and center pentagon out of the star so they’d be the negative space which would then leave the star attached to the circle. To cut the symbols out, I cut around them to cut for tracing onto the fabric later. It takes some patience and a sharp blade, but once it’s done it leaves a traceable and sturdy stencil to aid with the transfer process.
Once you’ve acquired your fabric, be sure to wash it first. This will pre-shrink it before you even begin. Dry it on low for approximately 60 minutes. If some of the edges have frayed in this process, fret not. Just trim them carefully off. You’ll want to iron your fabric out so the wrinkles and creases are minimized as much as possible. It’ll make your fabric a smooth surface for the transferring process to come.
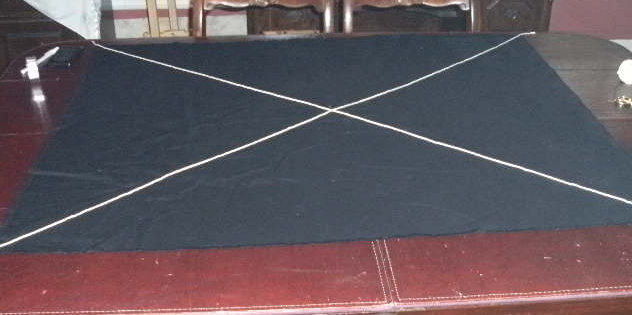
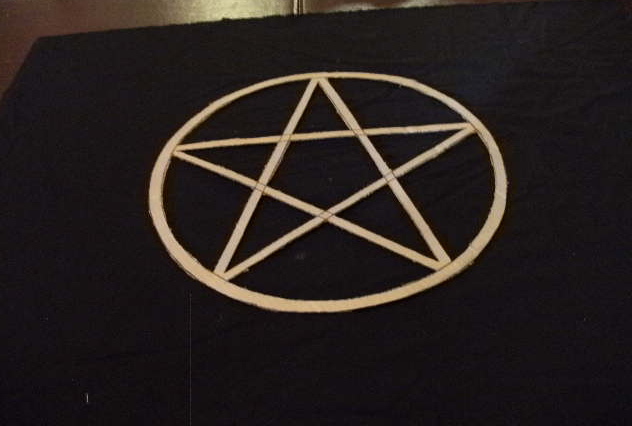
Lay your washed and ironed fabric out carefully on a flat surface. Take string as shown in the picture and make a giant X on the fabric to find the center. Once you’re fairly certain you’ve got it right, take your transfer pencil or pen and mark that spot. It’ll help you to center the pentagram circle where you want it. You can choose to either make your Devil’s Trap horizontal as I’ve done or you can do this vertically instead. It makes no difference which way you position it. This is merely a personal preference. For me, I found that it left a lot of space on the right and left side of the Devil’s Trap for signatures or a cool effect when someone should stand on it—without shoes of course! (I’m thinking Mark Sheppard, no?)
To keep the pentagram circle in place while you trace, take four pieces of either Scotch or masking tape and put them where ever you feel they’ll work for you. You’ll peel each one up as you come to them, so don’t worry. Doing this will prevent crazy sliding and getting off target. Take your transfer pencil or pen and slowly trace around everything. You may have to trace more than once to get the lines as visible as you want. Once you’re done, you should have a pentagram circle to start stitching.
I decided to do the symbols at a later time, focusing on getting the pentagram circle stitched in place first. To do this, I will be putting my fabric into a embroidery hoop to make the fabric tight for stitch work. Make sure it is taut, much like a drum. This will make your stitching easier to do and be tight in the fabric once completed. Remember that I will be dividing my 6 skein metallic thread into 2-plys. I will then thread these through the needle and pick a starting point. I started with the circles, doing both the inner and outer together. I alternated between the two, measuring as I went to make sure it retained the 1/2” space. Then, I moved onto the star itself.
To execute the back stitch, you will pull your thread up through the fabric, make a small stitch that is approximately 1/8th of an inch. When you bring your needle up next, you’ll go backwards—hence the name of the stitch being back stitch. Keep your stitches about the same as you go. What you’ll do here is take the needle and insert it into the stitch you just made. Pull the thread through until it is taut on the fabric. You should see that you’re making an outline of the transfer pattern then. Remember, keep your thread to no more than 12” long to prevent tangling and some of the fraying.
When you get to a stopping point, you will flip your fabric over and take the thread through the backside outline stitching to “tie” off the thread so it won’t work its way back out—thus undoing your work. To execute this, you’ll run the needle underneath your stitches without bring it up to the other side of the fabric. I tend to do it one way and then the other to prevent it from worming its way back out. You can also tie it into a knot, but it won’t be nearly as neat as the other method. You can then start again on another portion of the pattern! Note: If you find that the pattern is wearing off as you go, don’t fret. Just reposition the pattern on top as BEST as you can and retrace and then match it with a ruler or spot check that it will run together as it did before you started stitching. Since it is designed to rub off, it can be susceptible to fading as you hold the hoop.
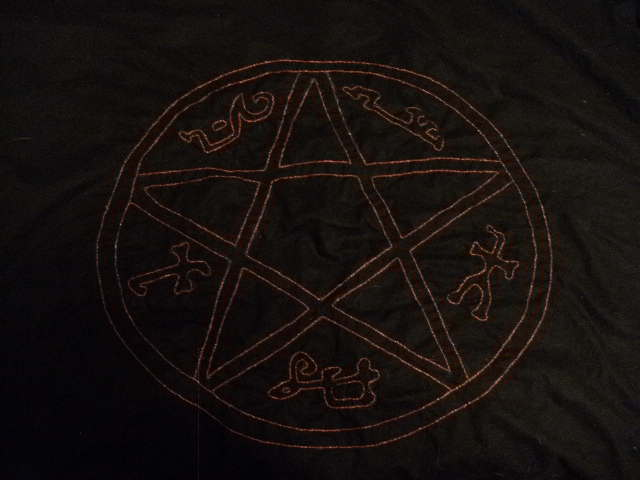
After you complete your pentagram circle you will start to add symbols. Do ONE at a time. Don’t worry about getting them all on at once. Start with one, transfer it in, back stitch it and repeat until all five are in place. This will give you a completed outlined Devil’s Trap. It’ll look cool at this stage, but it isn’t done yet.
Once you’ve completed your back stitching, you will then do your second stitch—the satin stitch. To do this stitch you will be filling in the pattern—coloring it if you will. I used three ply thread here to make it fill in more fully. You will want to make each stitch slow and careful so they will be straight. I tend to bring the needle up at one side and try to insert it on the other side of the pattern as straight as I can so that it will fill things in. It will be tricky to do on the circle, but should be easier to do on the star itself as those are straight lines. Use the same tying off method or knot to finish each stopping point.
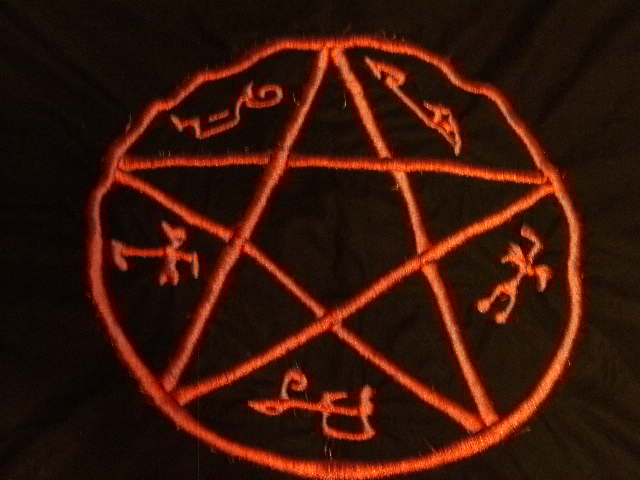
At this point you should have a completed Devil’s Trap that is well defined and impressive on your fabric. DON’T wash to get rid of your pattern lines. It will be tempting, but DON’T. The metallic thread and the particular stitches used here will not stand up to the agitation of a washing machine. You will want to protect your stitch work, however, so sew on the back fabric next. To do this, you will want to do a basic sewing stitch to marry each piece of fabric together. I used black embroidery thread but you can also use regular black thread to do this. It is both practical and clean in its appearance as the black thread will disappear into the black fabric.
To keep the edges from fraying, take strips of fabric measured 2” across and long enough for each edge. You’ll want to measure to get the new dimensions for your edging fabric. After embroidering the original fabric size, the thread will have pulled it more towards the center, making the edges and overall size just a bit smaller than it was originally. Wash and iron the edging fabric and then stitch it into place to make a border. I chose to do this in a rich red fabric to make the Devil’s Trap inside pop even more. You’ll just use the same basic sewing stitch you used to sew the two pieces of fabric together. I used red embroidery thread to do this with the same principle of the color disappearing into the fabric and leaving the edge clean.

Now that you’ve completed the project, now what? What do you do with a Devil’s Trap stitched on fabric? It was recommended by some to suggest to the Supernatural writers (particularly Robbie Thompson) that the boys get one of these to throw over a demon. Not sure how well it would work, but one never knows! To be serious, however, you can now turn it into a wall hanging. If you choose to hang yours on the wall, use a standard curtain rod with clip rings. It’ll make a stunning banner. You can also bring yours to Supernatural Conventions to have signed. Just don’t forget a silver marker!
And, if you’re not feeling the ambition to work on a Devil’s Trap from scratch, don’t fret! I’ve made one that is being auctioned off for charity. That charity happens to be the Juvenile Diabetes Research Foundation in honor of Mark Sheppard’s son, who has Type 1. For me, I also choose to auction this off in honor of my late uncle Terry. He also had Type 1 Diabetes. I remember seeing him have to endure tests daily for his blood sugar—and the insulin shots that accompanied those tests. It is a difficult disease—and it is one still without a cure.
Anything that helps fund research into that elusive cure is a good thing. Please, spread the word about this auction—or bid yourself! The prize is a 100% handmade embroidered Devil’s Trap banner plus a Creation Entertainment autograph ticket for Mark Sheppard to a convention of your choice—and the knowledge that 100% of the money will go towards the Juvenile Diabetes Research Foundation to make that cure closer to reality.
You can see this auction here.


Good luck for the auction!
It looks pretty nice and thank you for also showing how it was made. 🙂
– Lilah
Thanks. I hope it does really well.
I’m glad you enjoyed the story about how it was made. It’s not easy, but it’s certainly a labor of love.
Thanks again.
Hi Far Away Eyes, I’ve been following your articles about this quilt from the start. Thanks for the look into how it was done and what materials you used. The colors used almost make the Devil’s Trap appear to glow. It is very cool and I understand why people were so impressed with it at the con. I won’t be whipping one out any time soon, I think I mentioned before sewing on a button is a challenge for me but I like reading about what went into making it. Thanks.:)
Thanks for the comment.
I’m glad you’ve enjoyed the journey that went into making this. It was a lot of fun to make even if it did take some improvisation to make a pattern and get it onto the fabric in the first place. I’m working on another large banner right now. This one will be the Angel Sigil in the same thread color but on white. It’s slowly starting to come together.
Thanks again.
I like to think of what you’ve made, Far Away Eyes, as of a banner of SPN, it would have to be erected on the roof of the bunker, frightening all evil away!
Thanks for the comment.
Ha, I don’t know about putting it on the roof, but perhaps they could tack it up on a ceiling. They have really gotten into painting Devil’s Traps onto ceilings for awhile now–and the tactic often works! I’m currently working on another large banner—an Angel Sigil—but I also have a MOL Logo banner in mind, too.
Thanks again.