


Supernatural Quilting Bee: The Mark of Cain
Welcome back to the Supernatural Quilting Bee! The first installment centered our quilt with Sam and Dean’s initials, but now we can branch out and start to explore the various symbols in the show. The possibilities are endless, after all. Season nine gave us a new significant one that not only has intriguing lore but has changed one of the Winchester brothers. That symbol is none other than the Mark of Cain.
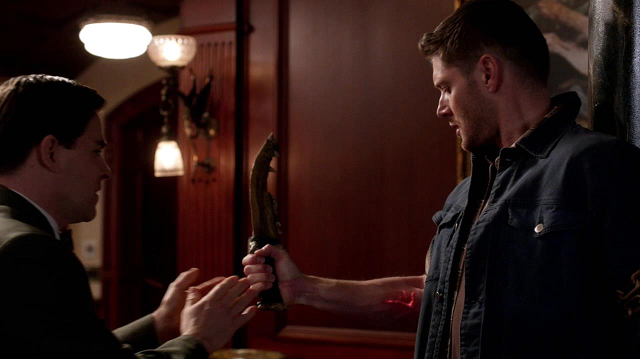
The Mark of Cain seemed like a natural choice the more I looked at it. When it’s not activated, it looks like a simple area of raised skin on Dean’s or Cain’s arm. It’s a bit angry and red and it has a distinctive shape that draws our notice, but it isn’t until we see Dean hold that First Blade that we really get to see the Mark in its true glory. I found myself really intrigued by it the more we saw it in action and the more it connected Dean to that Blade. It glows a rich and bright red, calling attention to itself. Hell, we saw it be so bright that it shone through Dean’s shirt! So I had to dig in and figure out how I’d take it from the show to the quilt.
So, let’s get to the nuts and bolts. How do you transform that Mark from Dean’s arm to a black square?
Let’s put our supply list together first. You’ll need:
Plain black fabric that will yield 3-4 total squares
DMC Light Effects Metallic Thread # E815 (Dark Ruby Red)
Embroidery needle
Embroidery hoop
Embroidery scissors
cardboard
Measuring Square
regular scissors
box cutter
masking tape
pencil
permanent marker
colored pencil of a different color than black
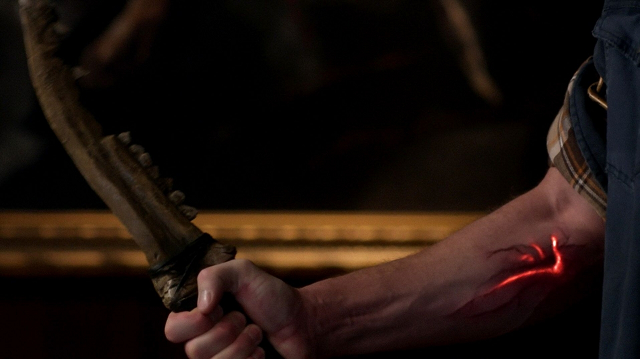
The first step is to find a good image of the Mark of Cain. This was really tricky to do simply because every image of it in the show is shown on someone’s arm—either Cain’s or Dean’s. That makes it hard to translate to fabric. What I did was take a screencap from “Blade Runners” with Dean pinned against the wall. The Mark is shown clearly and distinctly. From there, I zeroed in on just the Mark, making it into a screencap onto its own. I then manipulated it in Paint. This might take some trial and error on your part. I blew it up until I had the Mark around 6 inches long.

You’ll print this and then cut out the image to trace onto cardboard. I found, before I could actually cut mine out, I had to go over the printed Mark in pencil so I could follow it with my box cutter. It allowed me to get the symbol as close as possible to the version we see on Dean’s arm and gave me a smoother finish in my cuts—and my traced lines onto the cardboard.
I traced mine onto the fabric with the Mark running vertical. While we see it most often as a horizontal symbol on the show, it just made sense to run it vertical to fill up the square and avoid the design running off the edges. It’s always possible that the square could be turned horizontal when the quilt is stitched together, too. I also felt that the symbol was so distinct in either direction that other Supernatural fans would clearly be able to identify it.
Once you have it traced and re-traced in marker, cut that out slowly. You’ll then be ready to transfer that to the fabric. Remember, use a colored pencil to make your lines and trace them as often as you need to keep the design’s integrity. That way you can stitch the pattern into place and not worry about the drawn lines showing in the final product. Now the fun can begin!
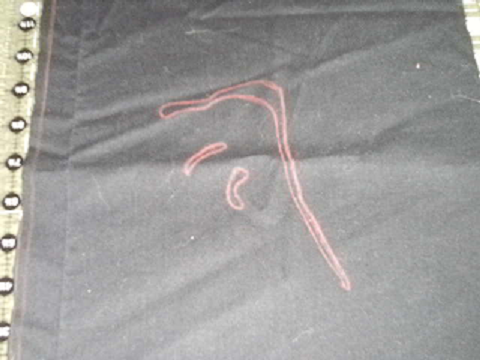
Like the first square, I used the backstitch and the satin stitch. It gave me the overall look I wanted. What’s different here, though, is the color. Silver worked really well for our first square because it captured Sam, Dean, and Baby so well. For the Mark, I knew I needed to go red. That mark glows beautifully when it’s activated, so I decided that going metallic red would translate that into my design well. I’ve worked with metallic red before and knew how it would give the Mark a glow when filled in. I felt that metallic dark ruby red would get us as close as possible in color to the Mark we see on Dean’s arm, too.
Do your backstitch carefully. I used 2 strands for my backstitch here. Remember, always keep those stitches as tiny as you can and go slowly. The red thread has a killer look in the finished product, but due to metallic thread’s tendency to shred, it can show off some of the white inside the thread more in the red than the silver. You’ll want it to be that dark, rich ruby red and not the white. Going slow will also keep the work as clean as possible and the curves of the Mark sharp. If you need a refresher, rewatch the video on the backstitch here.
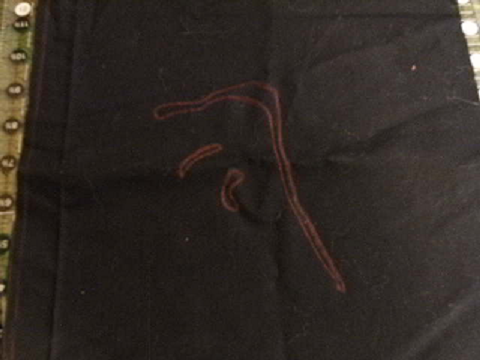
Once your Mark is outlined in the red thread, you’ll be halfway there. The Mark will look good at this stage, but not nearly as distinctive to the one we see on Dean’s arm. That’s why we’ll complete it with the satin. As with the center square’s satin, we’ll be using 3 strands to fill it in. You’ll want to keep that slow and steady wins the race mentality to make this as solid as possible. The red will really start to take on a glowing effect. I always pull each strand slowly to make sure the front lays flat and smooth as possible. If you need a refresher on this particular stitch, watch this video here.

Once you’ve completed all of your satin work, you’ll have a completed Mark of Cain. It should seem to glow on its own accord. The red should make it look rich and vibrant off of the black fabric, adding to its overall look.
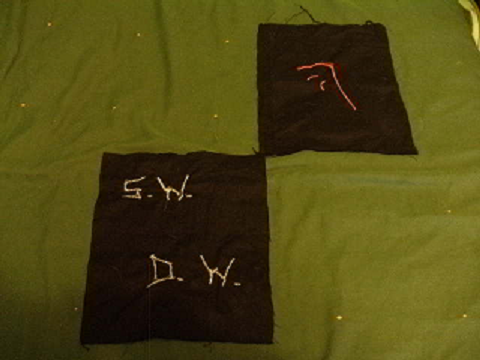
Since this is a quilt we’re making, you’ll want to then take the square and place it with your center square. I’ve chosen to place mine on the upper right corner of the center square. This can give you an idea of the quilt starting to take shape. As you complete squares, you’ll be able to decide which squares should go where and play with them. I really liked how these two squares seemed to contrast and compliment one another, making it clear that this is indeed a Supernatural Quilt.
But we’re so far from being done. We’ve got another black square to work on. The next one in our Supernatural Quilting Bee is perhaps our most complex one yet: a Devil’s Trap. I’ll show you how to go about making that step by step in the next installment. Until then, if you have any suggestions for Supernatural Quilt designs, feel free to share!

This is very cool Far Away Eyes. I have no skills or talents in the crafts so I am impressed! I find sewing on a button challenging. I can’t wait to see what you do next. So many symbols and images to chose from.
Thanks for the comment.
I’m glad you liked the Mark of Cain. I was really pleased with how this one turned out and how it fit well with my Sam and Dean square.
I’m pretty much to the point that I can’t watch TV without a needle and thread in hand, working into some fabric. So have no fear. We’ll have many squares yet.
I’m currently working on my Devil’s Trap. So far I’m pleased with it. I can’t wait to share it with you guys and see what you think.
Thanks again!
Wow, Far Away Eyes, that came out really nice! I’m like Leah, I have no talent in sewing, so I let others do the hard work. 😀 I’m sure you’ve thought of putting the Impala somewhere on your quilt. An outline of it in metallic silver thread would be so beautiful. I can’t wait to see your finished product.
Thanks for the comment.
I’m glad you liked how this square turned out. I was rather pleased with it when I had the finished product in my hand.
Hmm. As for an outline of Baby, that’s got lots of potential. I’ll have to shop around for images that get me close enough to be able to replicate something we’d all recognize as Baby.
I have no idea when I’ll have a finished product. At this rate, my wall quilt will need more than one wall!!
Thanks again and I hope you’ll like the next square as much.