Supernatural Quilting Bee: Devil’s Trap
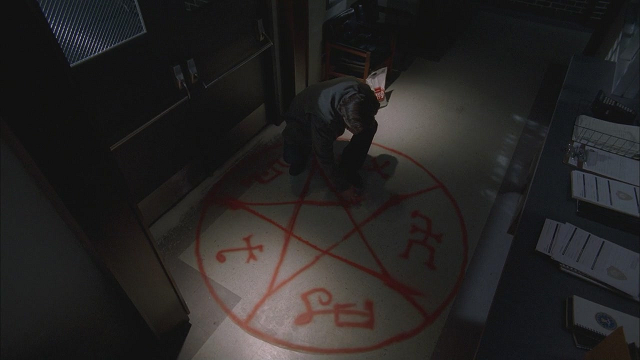
Out of all the symbols seen on Supernatural, the Devil’s Trap is perhaps one of the most recognizable. It dates back to season one’s finale, “Devil’s Trap,” and has been a staple weapon for Sam and Dean ever since. We’ve seen it drawn onto the Impala, painted on numerous floors, etched into bullets, painted on roads, and a few times on ceilings! This symbol is a go to for the Winchesters and their allies. Watch the show and focus on the background details and you’ll find a number of Devil’s Traps peppered through out. It’s a key symbol, and if a Supernatural Quilt is ever to be complete, it would need a Devil’s Trap. And so, it’s time for another installment of the Supernatural Quilting Bee.
So, let’s break down how to make this particular design.
Out of all the symbols we’ve stitched so far, this will be the most complex and with the most steps. But before we get into those nuts and bolts, let’s put together our supply list:
Plain black fabric that will yield 3-4 total squares
DMC Light Effects Metallic Thread # E815 (Dark Ruby Red)
Embroidery needle
Embroidery hoop—size 4-6 inches preferably
8.5” dinner plate
8” small mirror
Gold cardboard star
Embroidery scissors
cardboard
Measuring Square
regular scissors
box cutter
masking tape
pencil
permanent marker
colored pencil of a different color than black
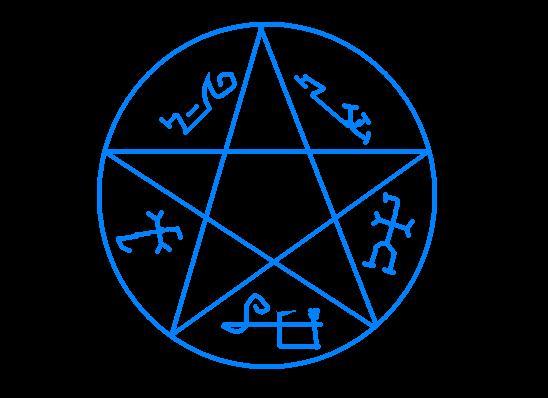
To translate the Devil’s Trap from the image we see so often on the show into a completed design, we’ll need to find a clean picture of just the Trap. So often, we’re seeing only a portion or something is covering up part of the Trap—either a demon strapped down in a chair or the Impala as we see the giant Trap painted at the crossroads. There’s never quite a complete shot. So, instead of hodgpoding a few of the Traps peppered through the show, I decided to scour the Internet. Quickly, I found one on Super Wiki that I relied on to make my Trap square. From there, I had to figure out how to draw the image to the size I needed. After all, it’s not a large picture when printed!
Using the Devil’s Trap found on the Wiki as a guide, I started with the circle. This was one of the trickiest steps. In reality, I needed two circles. One I would stitch to make the outer rim and one to make the inner. That way I could make the two circles one when I did my satin stitch. I decided that half an inch in between would suffice. That left me with another problem: how small could my outer circle be in order to fit the fabric, but how big it could be to keep the detail of the Trap. Space is required for the star and the symbols that make the Trap distinctive, after all.
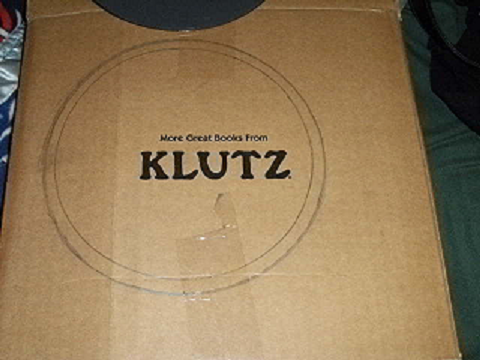
I found an 8.5” dinner plate and placed that onto the fabric. It filled up the majority of the space, leaving me with an equal edging on the top and bottom and equal edging give or take on the right and left edges. I traced the dinner plate onto my piece of cardboard. But how would I make my half inch smaller circle? I looked around the house for another item that could help me make my circles and came cross an 8” mirror. I traced that inside the larger circle, leaving me with the dual circles in place. Once those were traced onto my cardboard, I could focus on the second element: the star.
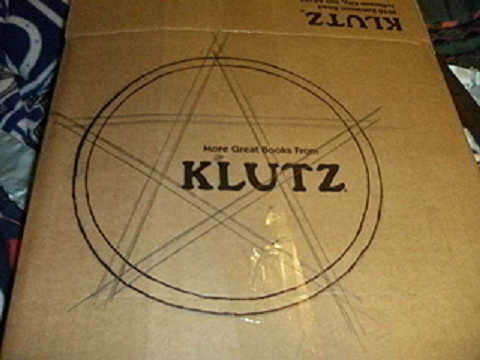
I used a cheap cardboard star from the dollar store to trace onto my circle, but I found that it was much too big. Little by little, I scaled it down by redrawing the lines until it fit. Much like the circle, I had to make the star twice. I needed a gap, but this time I scaled it down to 1/4”. This left me room between circle and star to put in each symbol. With the star in place, the last step was to put in the symbols.
Carefully, I drew each symbol in by hand based on the Super Wiki image. It took some drawing and redrawing, but I found that I liked their size and how they fit into the pattern emerging on the cardboard. Now all I had to do was cut it out for tracing onto fabric.
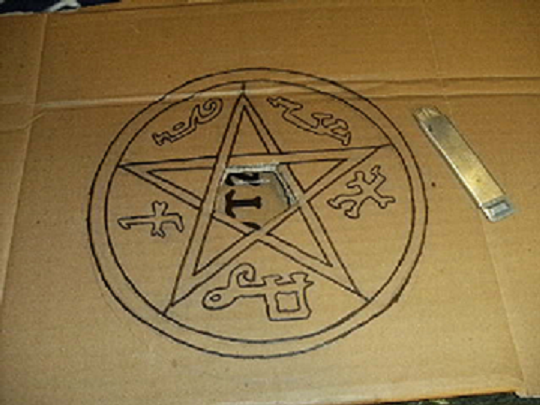
Slowly, I etched out the design. I needed the circle to be as round as possible. The sharpest box cutter made this sharp and clean. Then I did the same with the star. Due to the size of the design, I found it best to separate the star and the circle. The tiny line that connected the star to the circle would not cut out to keep them whole. Then, I debated about cutting out the symbols. I found it too challenging to make them traceable from cardboard to fabric, so instead I decided when it came time for the symbols I would redraw them on the fabric by hand. Practicing on the cardboard would make drawing them onto the fabric easier!
Now I could begin the process of stitching. Because this design fills so much of the square, the smaller the hoop you can find the easier it will be to stitch. I traced the circle only and set about backstitching. For my backstitch, I used two strands. If you need a refresher on this stitch, watch this video here.
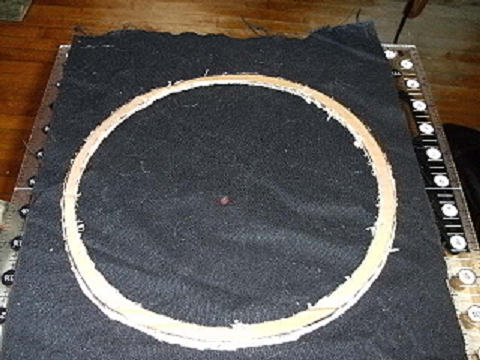
You’ll want to put both circles simultaneously onto the fabric to keep them as round and as spaced properly as possible. What I mean by that is it’s best to start with the outer circle, stitch around the curve slowly with small stitches, and then repeat along the same curve with the inner. It doesn’t matter which part of the circle you start on, but you’ll want to go all the way around to make sure you’ll match as close as possible by the end. I’ll warn you, this will take some patience. Just remember to go slow and the design will emerge on its own.
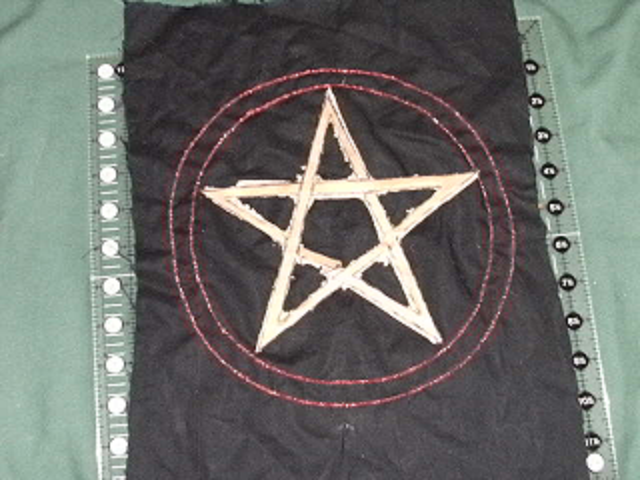
Once I managed to get all the way around, I then traced the star onto the fabric. You’ll want to take the star one point at a time. It’ll make sure that each point is as straight as possible and that they’ll then blend from one point to the next, making a complete star. Remember, go slow. You’ll want two triangles to emerge here. One little, one big. Then, add back in that little line from the very tip of the star point to the circle.
You’ll now have a completed pentagram in the very center of the square.
Now, take one symbol at a time. If you managed to make a cut out pattern of the symbols, then trace them. If not, draw carefully each one and backstitch them into place. I used the Super Wiki Image to make sure I not only got the shapes right, I also matched the angle they sit in the Trap so it would be as close to the image as possible. These will be delicate and have sharp curves to make the symbols look right. The slower you go and the smaller the stitch the easier it will be to make them look just right. After you’ve got all five in place, you can begin the process of satin stitch.
This is the stage that the Devil’s Trap will truly take on the familiar image we know so well from the show.
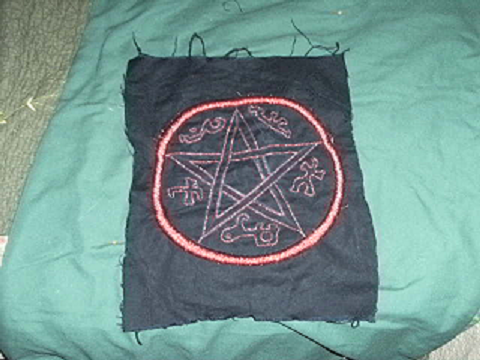
Just like we did with the Initial Square and the Mark of Cain Square, you’ll want to fill each area in with the satin. I used three strands of thread to cover up the design. I started with the circle, did the star, and then finished with the symbols. If you need a refresher on satin stitch, you can watch this video here. Just remember to go slow and you’ll keep the thread from fraying and the design flat and smooth.
Move your hoop on this design very very carefully. I tend to make sure that the screw that holds it locked on the fabric can’t possibly twist or catch on any of the satin I’ve already done. Because there’s so much fabric being covered and so much satin that needs to be done, you’ll need to take the hoop off each time slowly. Once I take the hoop off, I always give some tugs from the edges of the fabric all the way around. It makes the stitching the hoop was pinching lie flat and the new stitching become taut after it relaxes from being on the hoop. I tend to work my way around the design, from top to bottom, but you can work it any way you choose.
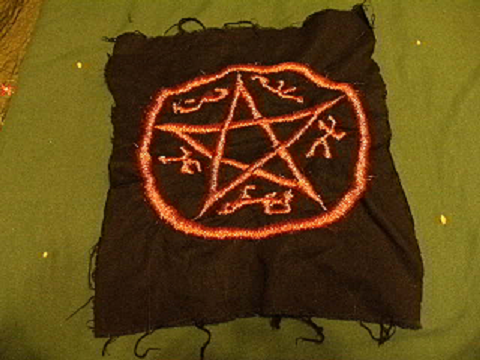
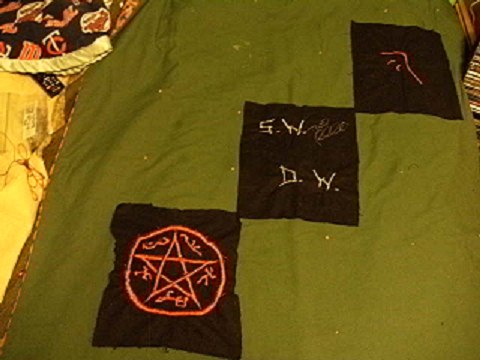
Once you’re done with all the satin work, you should now have a completed Devil’s Trap. This square will compliment the other two you’ve already made. You should also see the Quilt start to take shape. But make no mistake, there’s so much more Supernatural Quilting Bee to go! The next squares planned are a Salt Ring and Ruby’s Knife.




Leave a Reply